In this captivating blogger post, we dive deep into the world of " Technology Clever ," an extraordinary YouTube channel that's your one-stop destination for all things tech-savvy. About our Channel 👋 Hello there! I’m a tech lover, known for my savvy and dedication to always staying ahead of the curve. 🚀 I craft content that blends tech expertise with easy-to-understand language. My mission? To expand your knowledge and keep you informed about the latest in technology! 👓 💻 🔬 I delve into topics ranging from Artificial Intelligence, Robotics, to the Internet of Things and more. My compelling in-depth articles and podcasts will keep you aptly updated and fascinated. 🎙️ Ready to elevate your tech wisdom? Join me on this journey and stay informed about the future today. Let's learn together. Discover how this channel has become a beacon of knowledge, offering insightful information, and so much more. Join us on a journey that unveils the hidden gems of...
How to Download View Once Images & Videos On WhatsApp?
on
Get link
Facebook
X
Pinterest
Email
Other Apps
Download Links
Step-by-Step Guide to Using LS Patch, LSPosed Modules Repository, and Shizuku
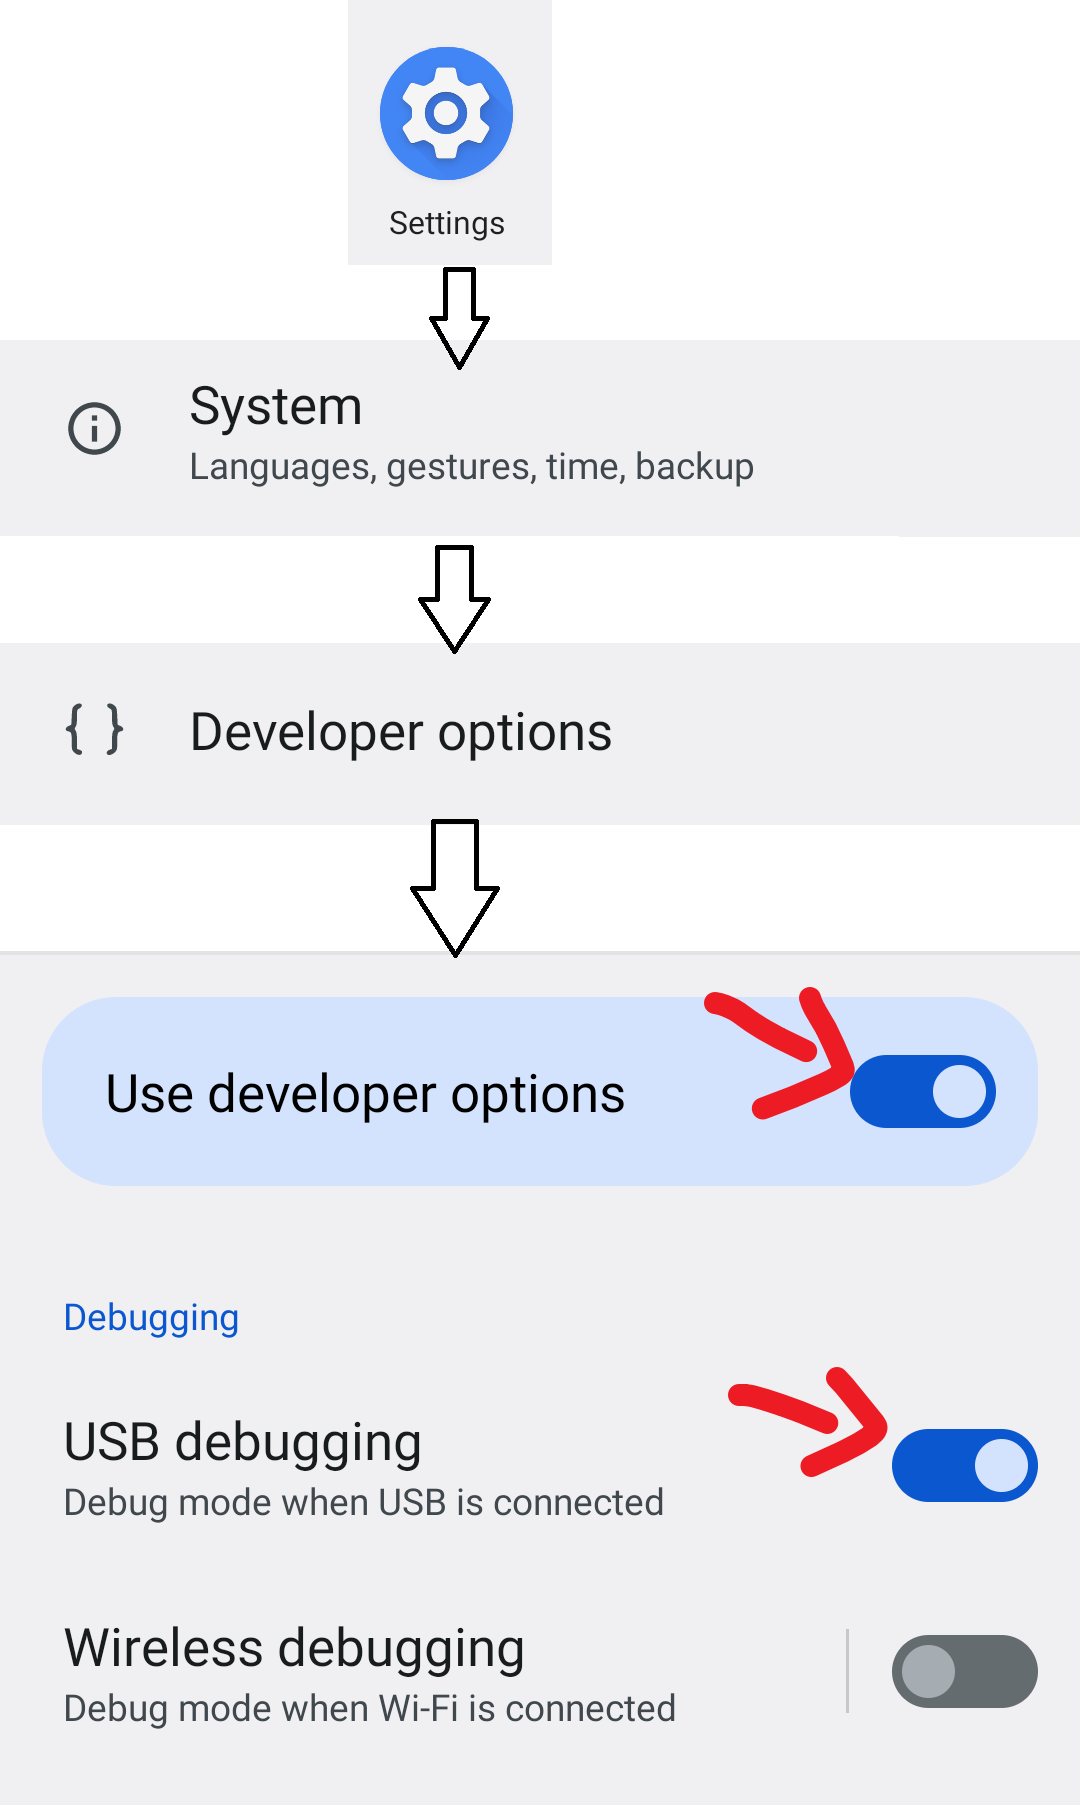
Go to Settings > About Phone > Build Number and tap it 7 times to enable Developer Options.
Go to Settings > Developer Options and enable USB Debugging.
Start Shizuku Service:
Open the Shizuku app.
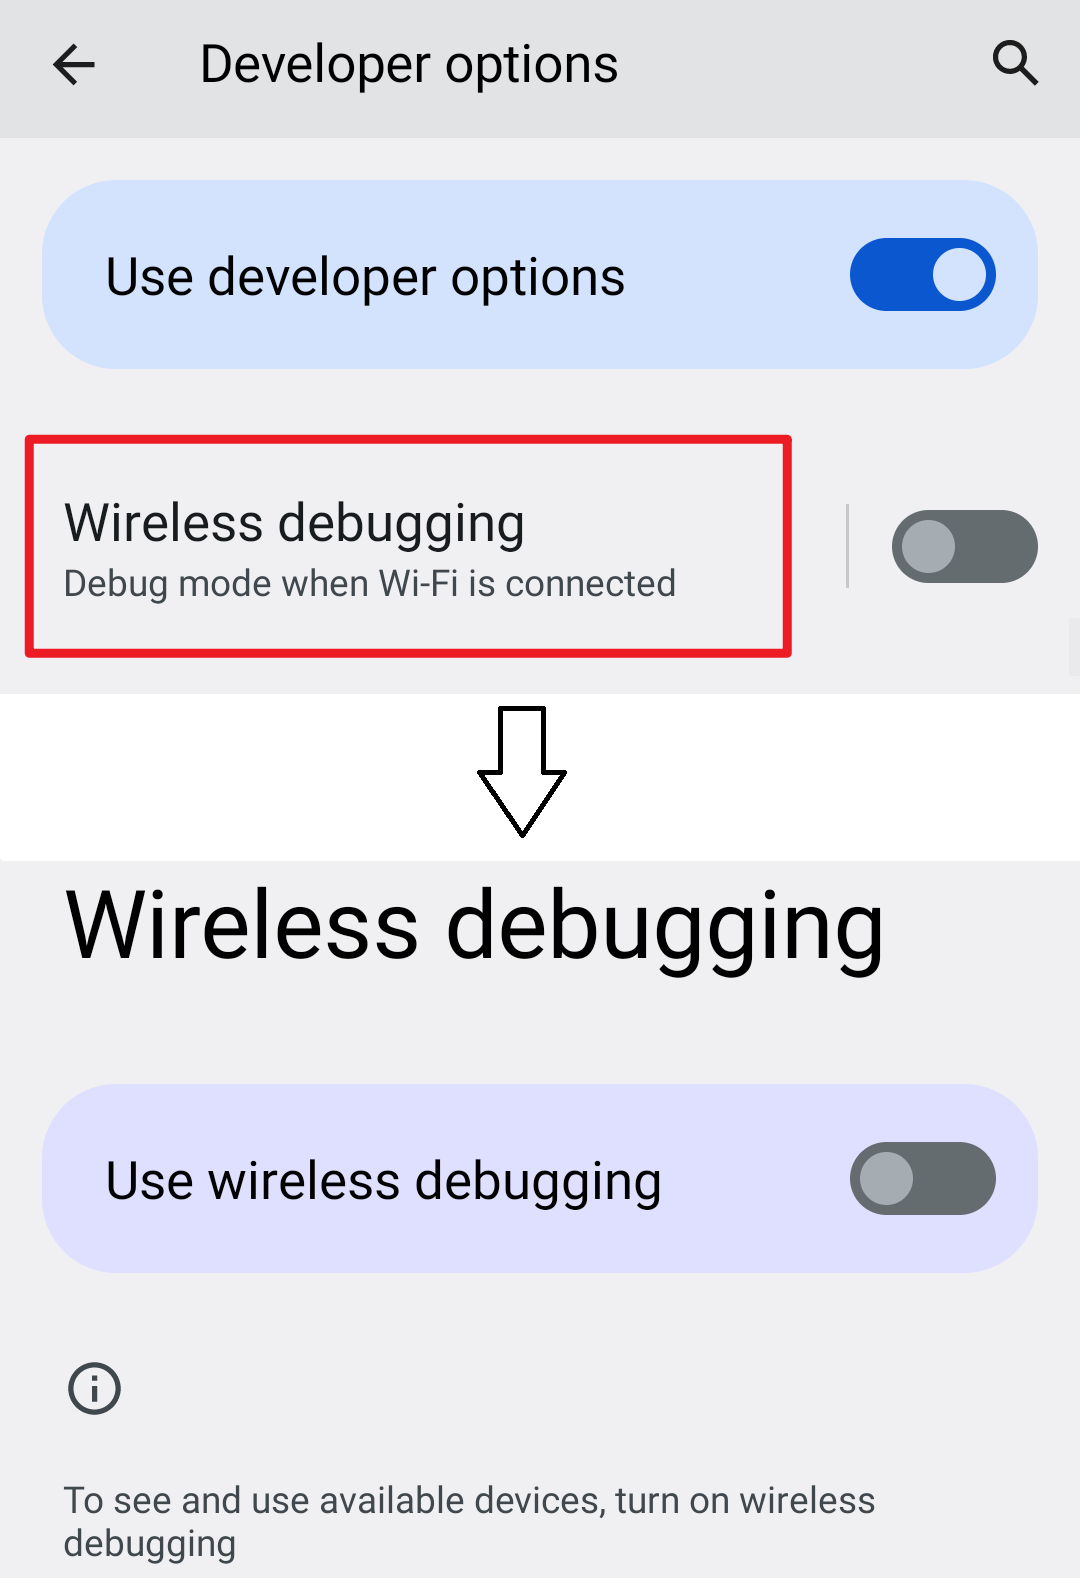
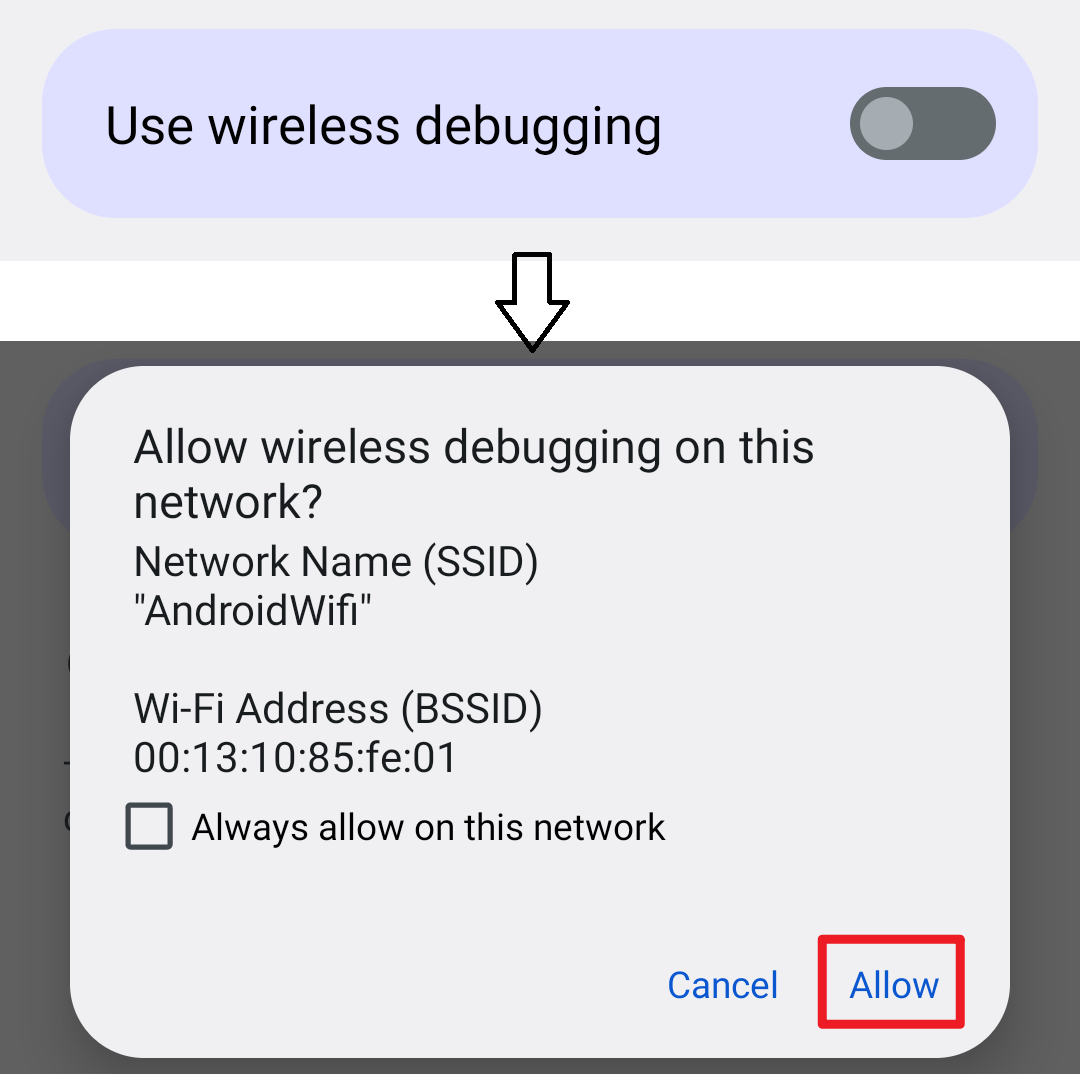
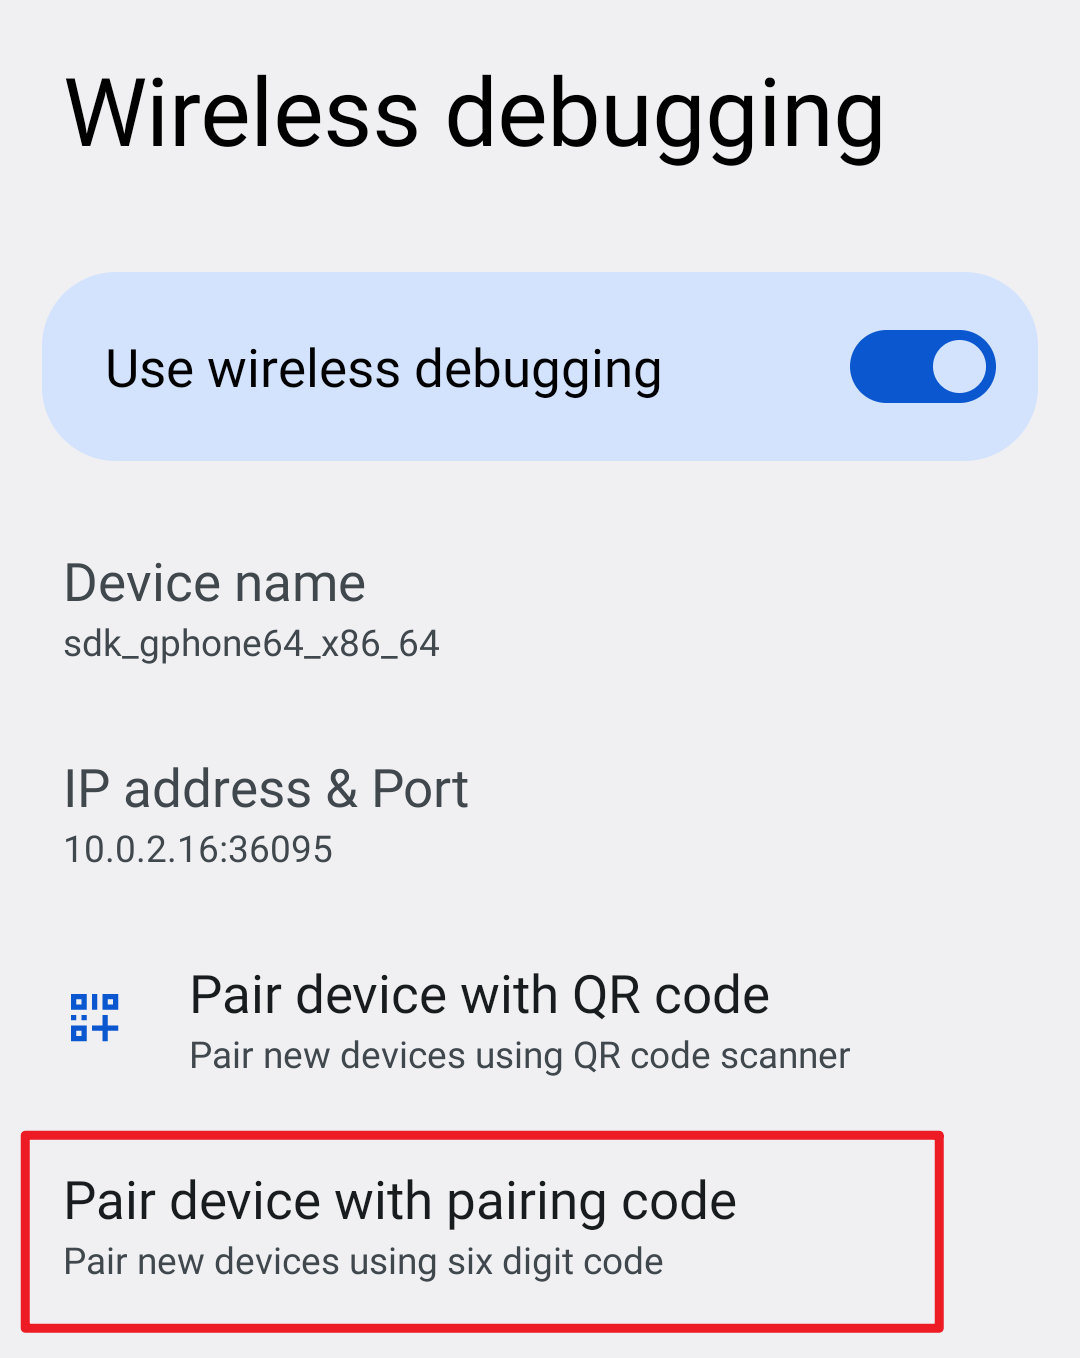
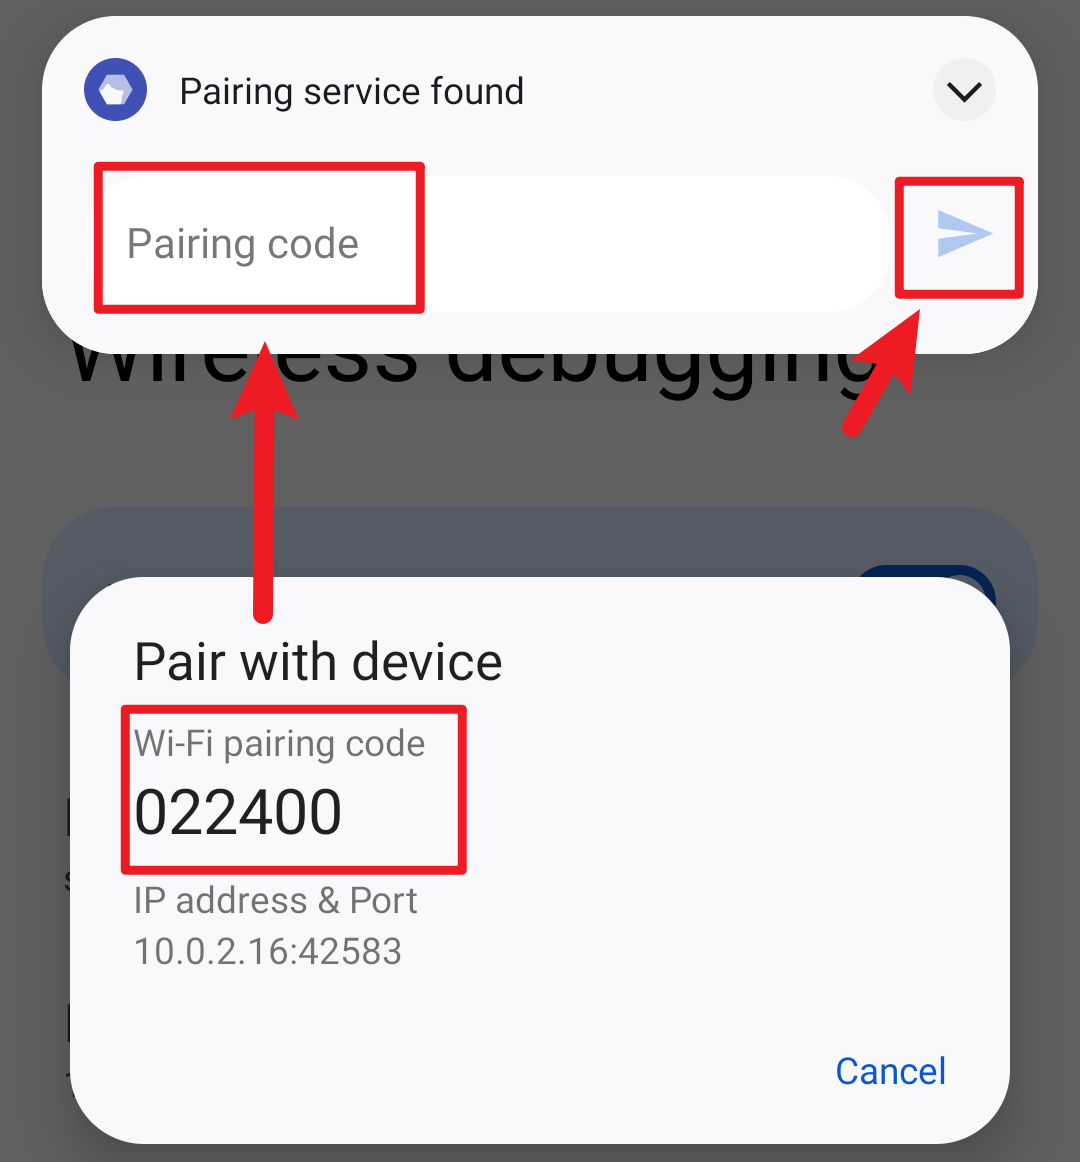
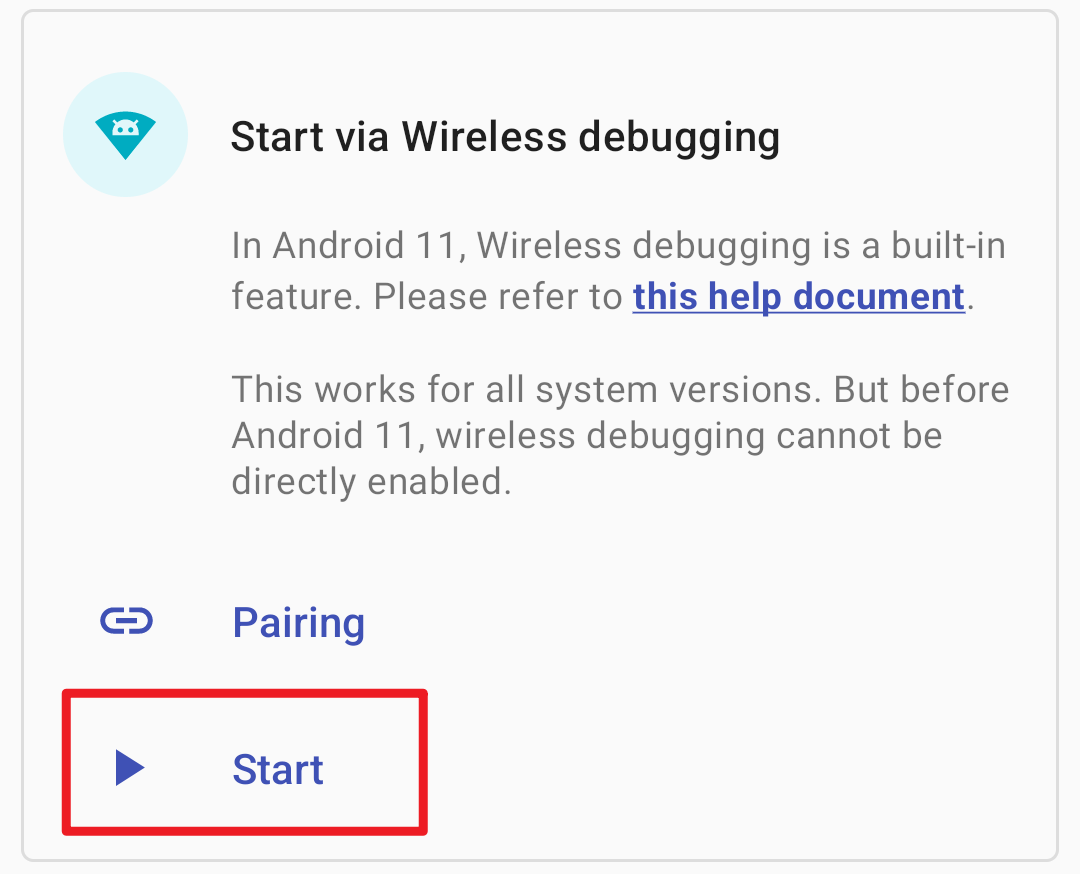
Tap on Start via Wireless debugging and follow the on-screen instructions to set it up without using a PC. This involves enabling wireless debugging from the Developer Options and pairing your device.
Step 2: Install and Set Up LSPosed
Download LSPosed:
Download the LSPosed APK from the official GitHub repository.
Apply the necessary patches to remove view once restrictions.
Step 4: Use LSPosed Modules Repository
Access LSPosed Modules Repository:
In the LSPosed Manager app, go to the Modules tab.
Tap on the repository icon to access the LSPosed Modules Repository.
Find and Install Relevant Modules:
Search for modules that can assist in bypassing WhatsApp's view once restrictions.
Install the desired modules and enable them.
Activate the Modules:
Go back to the Modules tab.
Enable the newly installed modules.
Reboot your device for the changes to take effect.
Step 5: Use WhatsApp with Modified Settings
Open WhatsApp:
After rebooting, open WhatsApp.
View Once Media:
The view once media restrictions should now be bypassed, allowing you to view the media multiple times.
Important Notes:
Legal and Ethical Considerations:
Modifying apps to bypass security features can be illegal and unethical. It can violate the terms of service of the app and could lead to account bans or legal action.
Security Risks:
Even without root, using such tools can expose your device to security vulnerabilities. Ensure you understand the risks involved.
Disclaimer:
This guide is provided for educational purposes only. I do not endorse or encourage violating app terms of service or engaging in unethical practices. Use this knowledge responsibly and within legal boundaries.
Download Links
LSPosed Framework
A Riru / Zygisk module trying to provide an ART hooking framework which delivers consistent APIs with the OG Xposed, leveraging LSPlant hooking framework.
Xposed is a framework for modules that can change the behavior of the system and apps without touching any APKs. That's great because it means that modules can work for different versions and even ROMs without any changes (as long as the original code was not changed too much). It's also easy to undo. As all changes are done in the memory, you just need to deactivate the module and reboot to get your original system back. There are many other advantages, but here is just one more: multiple modules can do changes to the same part of the system or app. With modified APKs, you have to choose one. No way to combine them, unless the author builds multiple APKs with different combinations.
Note: debug builds are only available in Github Actions.
Get Help
Only bug reports from THE LATEST DEBUG BUILD will be accepted. - GitHub issues: Issues - (For Chinese speakers) 本项目只接受英语标题的issue。如果您不懂英语,请使用翻译工具
For Developers
Developers are welcome to write Xposed modules with hooks based on LSPosed Framework. A module based on LSPosed framework is fully compatible with the original Xposed Framework, and vice versa, a Xposed Framework-based module will work well with LSPosed framework too.
How to Download WhatsApp Videos and Images with View Once Feature Bypass using LSPatch and Shizuku
This guide provides step-by-step instructions on how to download WhatsApp videos and images with the "View Once" feature bypassed using LSPatch and Shizuku.
Prerequisites
A non-rooted Android device
Basic knowledge of Android app installation
Steps
Step 1: Install and Set Up Shizuku
Download Shizuku: Install Shizuku from the Google Play Store.
Enable Developer Options and USB Debugging: Go to Settings > About Phone > Build Number and tap it 7 times to enable Developer Options. Go to Settings > Developer Options and enable USB Debugging.
Start Shizuku Service (Manual Method): Open the Shizuku app. Tap on Start via Wireless debugging and follow the on-screen instructions to set it up without using a PC. This involves enabling wireless debugging from the Developer Options and pairing your device.
Step 2: Install and Set Up LSPosed
Download LSPosed: Download the LSPosed APK from the official GitHub repository.
Install LSPosed: Install the LSPosed APK on your device.
Open LSPosed Manager: After installation, open the LSPosed Manager app.
Install LS Patch: Install the LS Patch APK on your device.
Patch WhatsApp: Open the LS Patch app. Select WhatsApp from the list of installed apps. Apply the necessary patches to remove view once restrictions.
Step 4: Use LSPosed Modules Repository
Access LSPosed Modules Repository: In the LSPosed Manager app, go to the Modules tab. Tap on the repository icon to access the LSPosed Modules Repository.
Find and Install Relevant Modules: Search for modules that can assist in bypassing WhatsApp's view once restrictions. Install the desired modules and enable them.
Activate the Modules: Go back to the Modules tab. Enable the newly installed modules. Reboot your device for the changes to take effect.
Step 5: Use WhatsApp with Modified Settings
Open WhatsApp: After rebooting, open WhatsApp.
View Once Media: The view once media restrictions should now be bypassed, allowing you to view the media multiple times.
Important Notes:
Legal and Ethical Considerations: Modifying apps to bypass security features can be illegal and unethical. It can violate the terms of service of the app and could lead to account bans or legal action.
Security Risks: Even without root, using such tools can expose your device to security vulnerabilities. Ensure you understand the risks involved.
Disclaimer:
This guide is provided for educational purposes only. I do not endorse or encourage violating app terms of service or engaging in unethical practices. Use this knowledge responsibly and within legal boundaries.
Starting with wireless debugging works on Android 11 or above. This startup method does not require a connection to a computer. Due to system limitations, the startup steps need to be performed again after each reboot.
This boot method works on unrooted devices running Android 10 and below. Unfortunately, this startup method requires a computer. Due to system limitations, the boot steps need to be performed again after each reboot.
Android Debug Bridge (adb) is a versatile command-line tool that lets you communicate with a device. The adb command facilitates a variety of device actions, such as installing and debugging apps, and it provides access to a Unix shell that you Can use to run a variety of commands on a device.
Many manufacturers have made modifications to the Android system that prevent Shizuku from working properly.
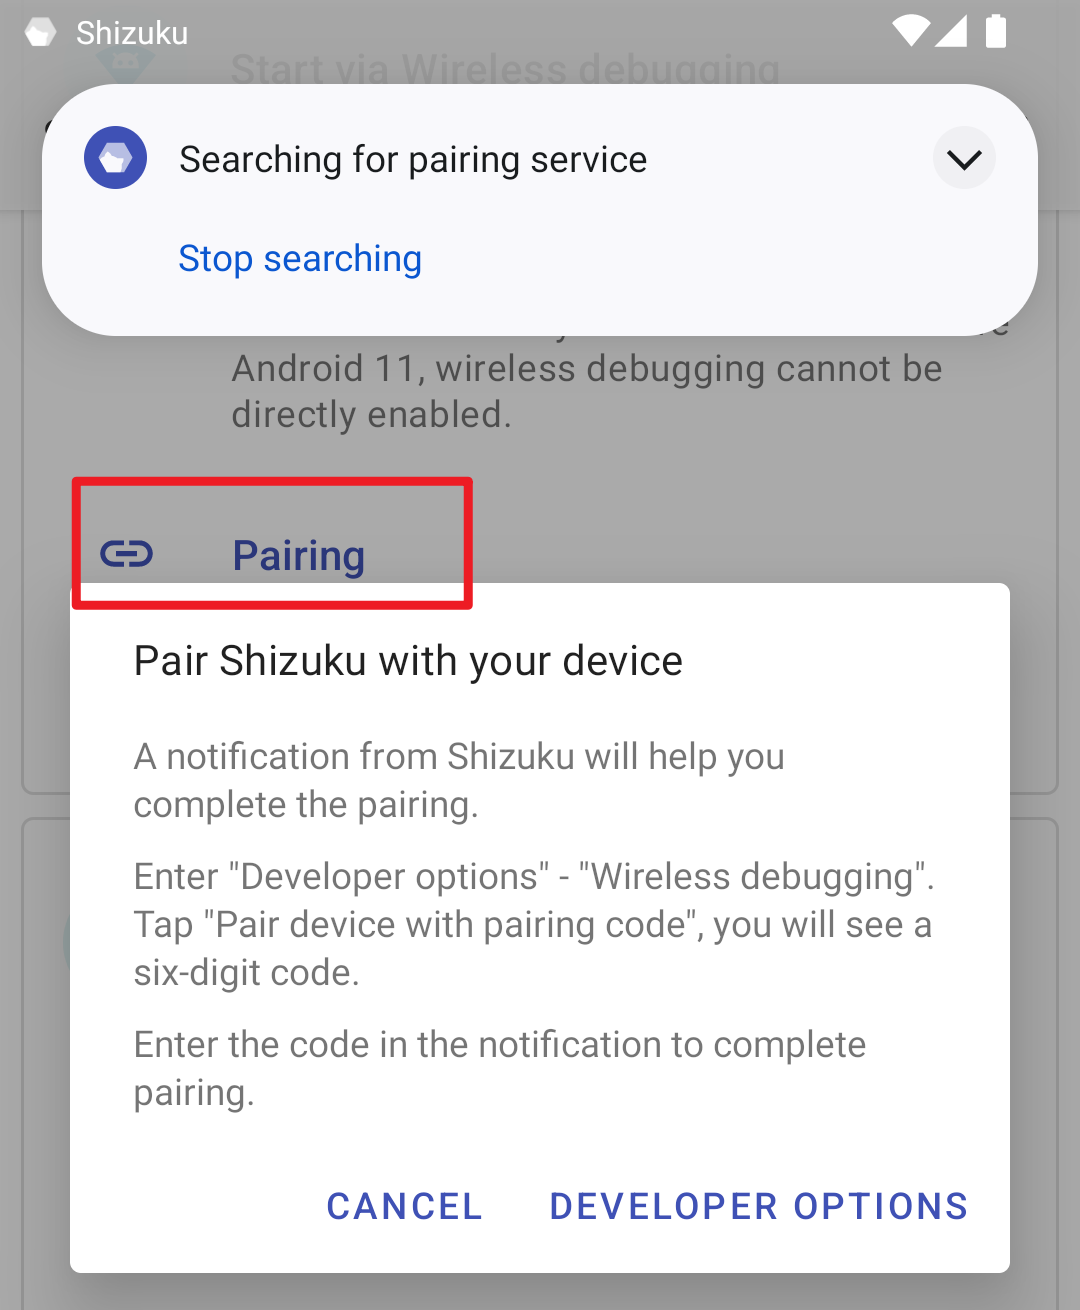
#Start via wireless debugging: keeps showing "Searching for pairing service"
Please allow Shizuku to run in the background.
Searching for pairing service requires access to the local network, and many manufacturers disable network access for apps as soon as they become invisible. You can search the web for how to allow apps to run in the background on your device.
#Start via wireless debugging: immediately fail after tapping "Enter pairing code"

Comments